
After
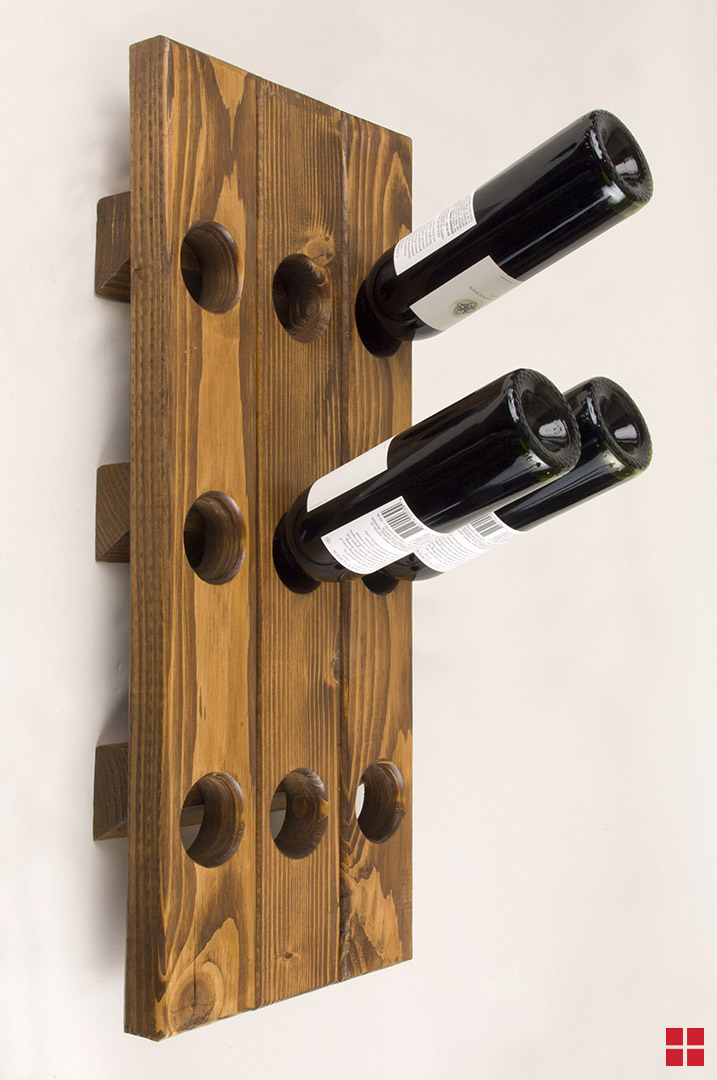
Make your own wall-mounted wooden wine rack to store your bottles in a visually appealing way. Follow these steps to complete your own DIY wine rack.
- Set-up a workspace in a well ventilated area (such as a garage).
- Cut each 2x4 into 32” pieces
- Using one 2x4,- measure out the four spaces for the circular drill bit. Starting at the top measure 4- to 4.5-inch intervals. This is your preference; divide the four holes equally at either 4” intervals or 4.5” intervals. Once you have marked and cut out one of the boards, line up the remaining three boards and drill each 2x4 to match the original board.
- From the remainder of the 2x4s, cut 4 pieces to 13.5” in length. These will be used for the rear horizontal cross bars.
- Line up the 2x4s that have been predrilled with the circular drill.
- Attach the rear horizontal bars pointed downward and mount them just above the entry holes on the backside.
- Sand the entire surface lightly progressing from 120-grit to 180-grit sandpaper, and finishing with 220-grit sandpaper. Always sand in the direction of the grain.
- Remove sanding dust between each step by lightly dragging the tack cloth across the surface.
- Using a clean, lint-free rag, apply Rust-Oleum Ultimate Wood Stain to the wood. Let the wood stain sit for 2-3 minutes, then use a clean rag to wipe off any excess, wiping in the direction of the grain. Ensure all excess stain is removed from the surface.
- Let dry overnight.
- Apply Rust-Oleum Ultimate Polyurethane with a high quality synthetic bristle paint brush.
- Allow to dry 2-4 hours.
- Attach heavy-duty grip hanger to the back of the wine rack to hang.
Other Materials:
- (3) 2” x 4”, 8’ each
- 2” Circular Drill Bit
- (22) 2” Wood Screws
- Lint Free Rag
- Gloves
- Synthetic Bristle Brush
- Sandpaper: grits 120, 180, 220
- Tack Cloth
- Heavy Duty Grip Hanger
Locate a Rust-Oleum Retailer
Rust-Oleum products are sold at retailers across the country. Use our store locator to find Rust-Oleum products at retailers near you.
